Getting Started with Pink and White Nails
Pink and white nails, also known as French manicures, are a classic style that’s suitable for various occasions. They resemble natural nails and are a timeless choice. But, how do you get started? Let’s dive in!
Understanding Nail Anatomy
First things first, understanding your nail structure is crucial. The nail is made up of several parts, each with a specific role. There are resources available, including videos, that explain the parts of the nail and its anatomy. This video is a great starting point.
Essential Tools and Supplies
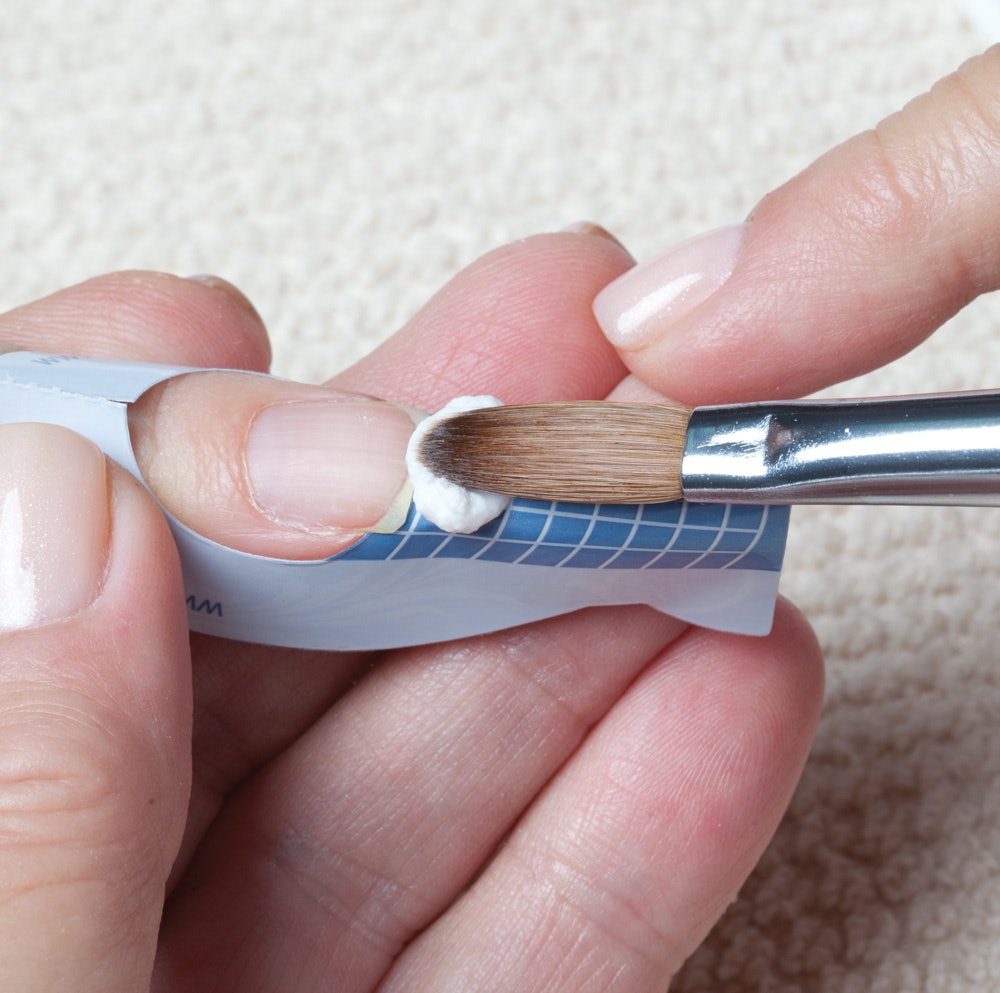
Next, gather your tools. You’ll need a base coat, a pink or nude color polish, a white polish for the tips, and a topcoat. A nail file, cuticle pusher, and nail brush are also handy. If you’re going for acrylic nails, you’ll need additional supplies like acrylic powder and a nail cutter tool. The ProTool EZ French Pink & White Acrylic Nail Cutter Tool is a popular choice.
Choosing the Right Polish
When choosing your polish, consider the quality. High-quality polishes last longer and give a smoother finish. They may cost more, but they’re worth it.
Preparing Your Nails
Before you start, clean your nails thoroughly. Push back your cuticles and shape your nails.
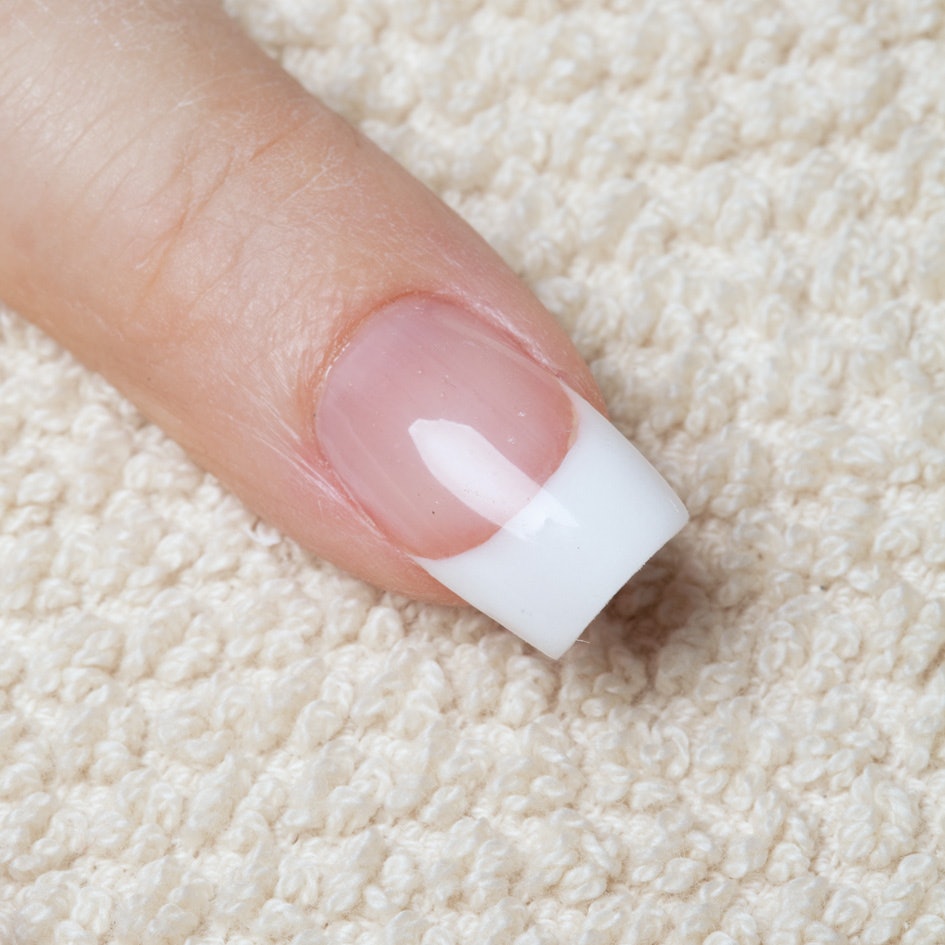
A rounded or square shape works best for pink and white nails.
Applying the Base Coat
Apply a thin layer of base coat to protect your nails. It also helps the polish adhere better. Let it dry fully before moving on.
Applying the Color
Next, apply the pink or nude polish. Start with a thin layer and build up to the desired opacity. Remember to apply in three stripes – one on each side and one down the middle. This ensures an even application.
Adding the White Tips
Once the color is dry, it’s time for the white tips. You can use a stencil or freehand it. If you’re a beginner, a stencil might be easier. Apply the white polish to the tips and let it dry.
Sealing with a Top Coat
Finally, seal your manicure with a topcoat. This adds shine and protects your nails from chipping.
Maintaining Your Manicure
To keep your manicure looking fresh, avoid using your nails as tools. Wear gloves when doing dishes and avoid picking at chipped polish. Use a nail oil daily to keep your nails healthy.
Getting started with pink and white nails might seem daunting, but with the right tools and a little practice, you can achieve salon-quality results at home. So, why not give it a try? You might just find your new favorite manicure style!
Step-by-Step Instructions for Pink and White Nails
Preparing Your Nails
First, clean your nails. Use a nail brush to remove any dirt. Push back your cuticles gently with a cuticle pusher. This step is crucial. It ensures a neat and clean canvas for your manicure.
Next, shape your nails. Pink and white nails look best in a rounded or square shape. Use a nail file for this. Make sure to file in one direction to avoid damaging your nails.
Applying the Base Coat
Now, it’s time for the base coat. This thin layer protects your nails. It also helps the polish stick better. Apply it carefully and let it dry fully. Patience is key here. Rushing can lead to smudges and uneven application.
Choosing and Applying the Color
Next, choose your polish. Quality matters. High-quality polishes give a smoother finish and last longer. They might cost more, but they’re worth it.
Apply the pink or nude polish next. Start with a thin layer. Build up to the desired opacity. Apply in three stripes – one on each side and one down the middle. This ensures an even application.
Creating the White Tips
Once the color is dry, it’s time for the white tips. You can use a stencil or freehand it.
If you’re new to this, a stencil might be easier. Apply the white polish to the tips and let it dry.
Sealing with a Top Coat
Finally, seal your manicure with a topcoat. This adds shine and protects your nails from chipping.
Maintaining Your Manicure
To keep your manicure looking fresh, avoid using your nails as tools. Wear gloves when doing dishes and avoid picking at chipped polish. Use a nail oil daily to keep your nails healthy.
Practicing Your Skills
Practice is key to perfecting pink and white nails. Don’t be discouraged if your first few attempts aren’t perfect. Keep trying and you’ll improve.
Visiting a Nail Salon
If you’re struggling, consider visiting a nail salon. Professionals like those at Pink ‘n’ White Nail and Hair Salon can help. They specialize in matching nails to attire. Regular salon visits also provide a psychological benefit for clients.
Learning from Others
There are many resources available to help you learn. A YouTube tutorial by Nail Dip Studio offers a step-by-step guide using dip powder. There are also tutorials available for DIY application of pink and white acrylic nails.
Understanding the Difference
It’s important to understand the difference between French manicure and pink and white nails. French manicures typically last three to four days, but can be extended with daily application of a thin coat of clear nail polish. Pink and white nails, on the other hand, use plastic tips or sculpting and can last much longer.
Remember, each nail style has its own advantages and disadvantages. Find the best fit for you and enjoy the process of creating beautiful nails.
Advanced Techniques for Pink and White Nails
Venturing into the world of pink and white nails? You’re in for a treat. This classic look never goes out of style. But, to truly master it, you need to know a few advanced techniques. Don’t worry, we’ve got you covered.
Mastering the Art of Shaping
First, let’s talk about shaping. Pink and white nails look stunning in a variety of shapes. From rounded to square, the choice is yours. But, remember, each shape requires a different technique. So, practice is key. Don’t be afraid to experiment. You might surprise yourself with what you can achieve. For more on nail shapes, check out NailPro’s Guide to Nail Shapes.
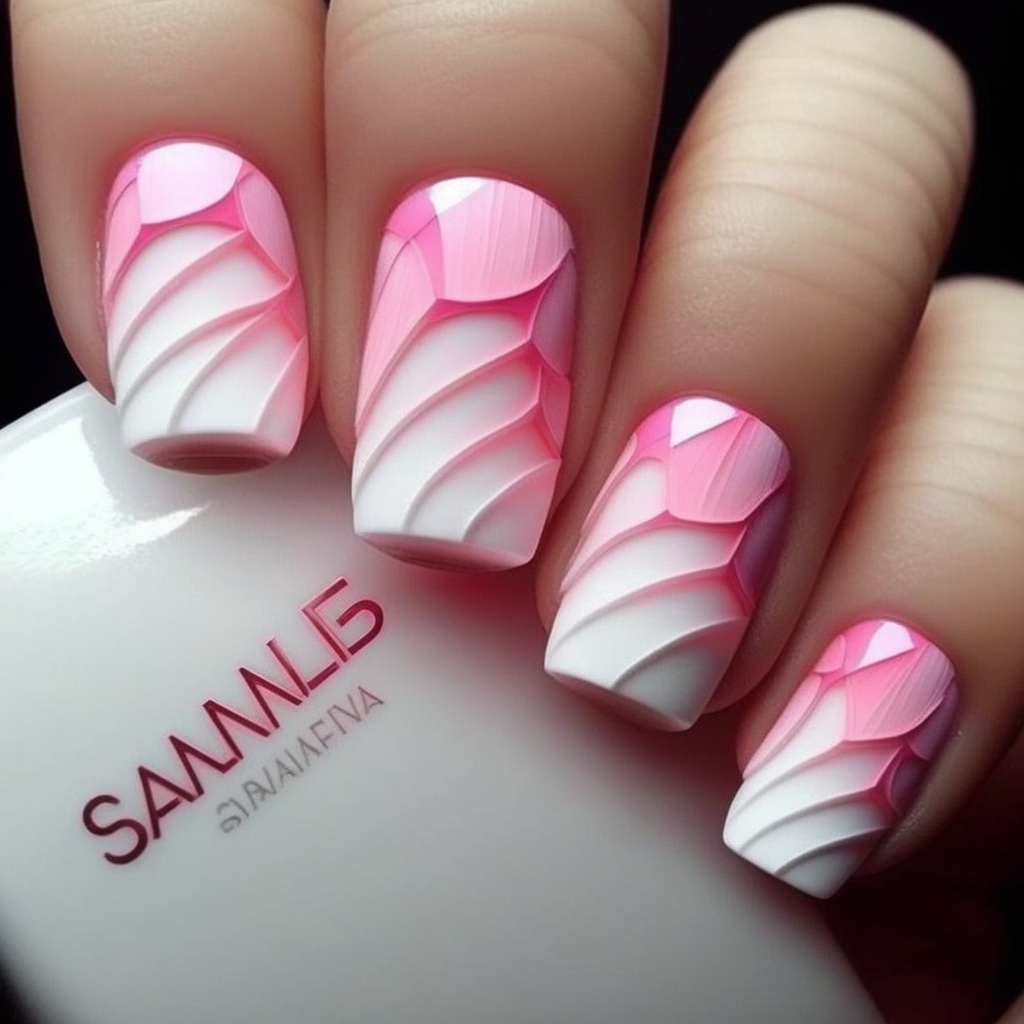
Creating the Perfect Ombre Effect
Next, let’s tackle the ombre effect. This subtle transition from pink or nude to white can be tricky. But, with patience and precision, you can nail it. Start with a light base. Gradually build up the color. Remember, less is more. A gentle touch can create a stunning effect.
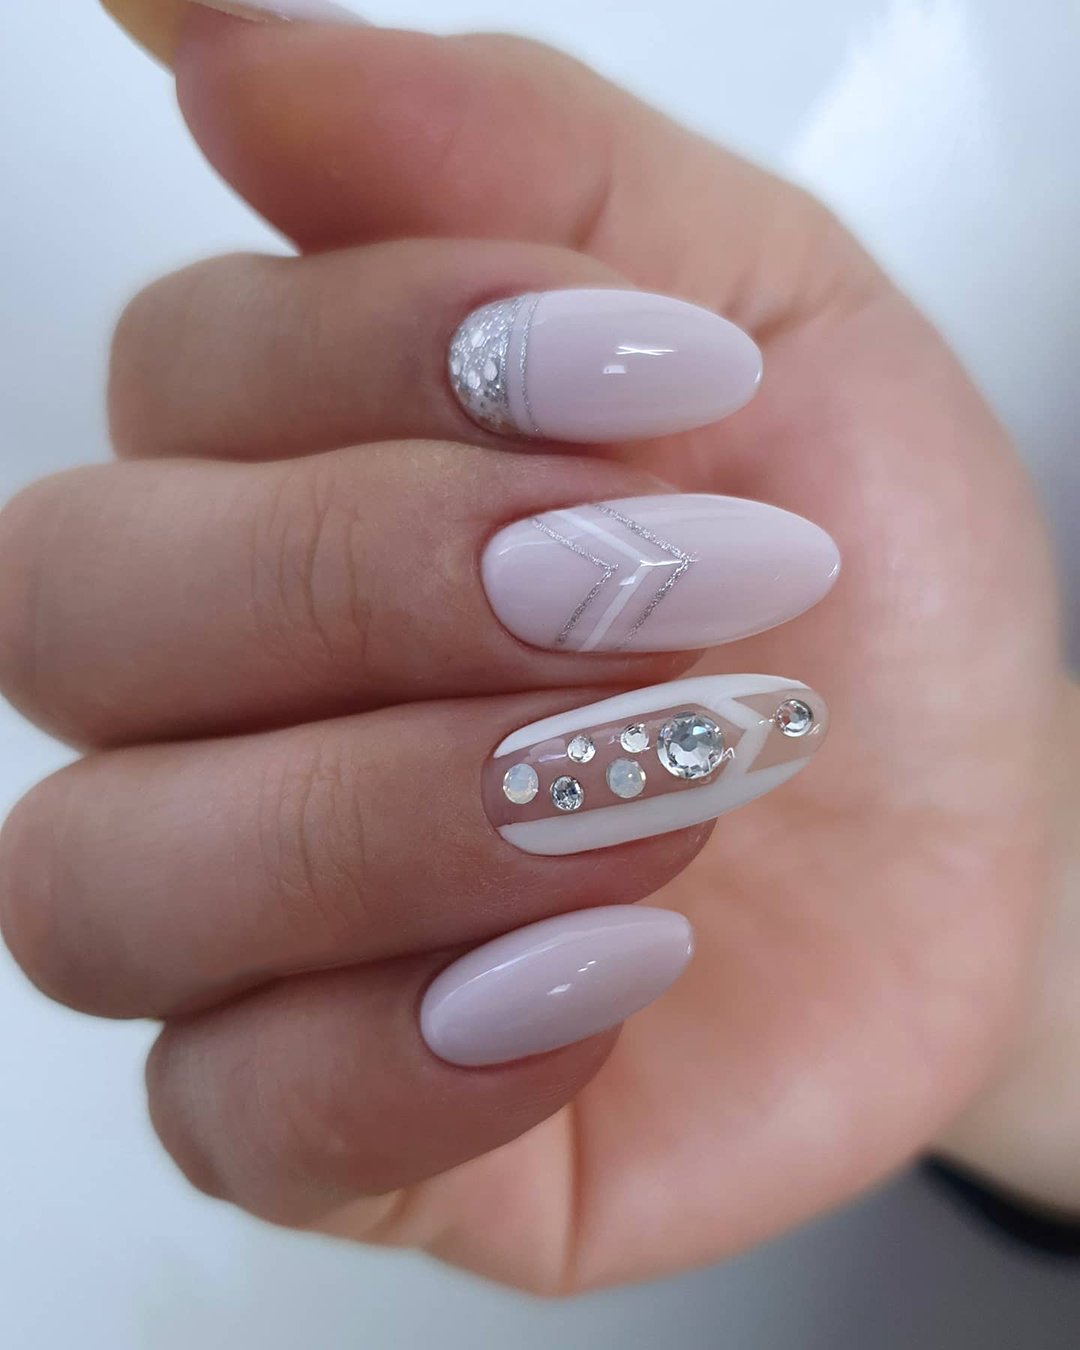
Adding a Creative Twist
Feeling creative? Why not add a twist to the classic French tip design. From rhinestone embellishments to gold flakes, the options are endless. You can even try a razzle dazzle design for standout Frenchies. Or, opt for a pink marble design with gold flakes. The choice is yours.
Dealing with Common Challenges
Of course, every nail artist faces challenges. Air bubbles in clear acrylic, lifting, and water getting under acrylic nails are common. But, don’t fret. With the right troubleshooting tips, you can overcome these hurdles. For instance, using a clear product for the bed of the nail can prevent color mixing. And, applying pink gel solely in the nail bed area can avoid running into the white tip.
Learning from the Pros
Finally, don’t forget to learn from the pros. YouTube tutorials, like those from Nail Dip Studio, offer a wealth of knowledge. They provide step-by-step guides using dip powder. Plus, they offer tutorials for DIY application of pink and white acrylic nails.
Remember, practice makes perfect. So, don’t be discouraged if your first few attempts aren’t flawless. Keep trying, and soon, you’ll be creating pink and white nails like a pro. Happy painting!
Expert Tips and Secrets for Pink and White Nails
Unlock the Secrets of Perfect Pink and White Nails
Ready to take your nail game to the next level? Let’s dive into the expert secrets for perfect pink and white nails.
Preparation is Key
First off, nail health is crucial. Remember, your nails are a canvas. And a smooth, healthy canvas leads to a beautiful masterpiece. So, invest in a good nail care routine. Keep your nails clean and moisturized. Regularly use a cuticle oil like O.P.I. Avojuice. It’s hydrating and fast-absorbing.
Master the Art of Application
Next, focus on the application. Light layers are your best friend. They lead to a clean manicure. And they prevent those pesky air bubbles. Also, remember to apply a top coat every two days. It prolongs the life of your polish.
Choose the Right Tools
The right tools can make a world of difference.
Separate nail clippers for fingers and toes are a must. And always ensure your tools are clean and disinfected. It’s a simple step, but it can save you from infections.
Embrace the Power of Press-Ons
Press-on nails are a game-changer. They’re a great alternative to traditional manicures. And they can last one to two weeks if you keep your fingers dry. Plus, they’re affordable and reusable. Check out Etsy for a wide range of handmade press-on nails.
Learn from the Pros
Finally, don’t be afraid to learn from the pros. YouTube tutorials, like those from Nail Dip Studio, are a goldmine of information. They offer step-by-step guides and tips for DIY application of pink and white nails.
Practice Makes Perfect
Remember, practice makes perfect. So, don’t be discouraged if your first few attempts aren’t flawless. Keep trying, and soon, you’ll be creating pink and white nails like a pro.
Final Thoughts
Mastering the art of pink and white nails takes time and patience. But with these expert tips and secrets, you’re well on your way to achieving salon-quality nails at home. So, why wait? Start your nail journey today. Happy painting!
Must-Have Pink and White Nails Products
When it comes to perfecting pink and white nails, the right products can make all the difference. From nail kits to cuticle oils, here’s a rundown of the must-haves for your at-home manicure.
Start with a Solid Nail Kit
First up, you’ll need a good nail kit. The Kiss under-$10 set is a great place to start. It includes 24 white extensions, nail glue, acrylic powder, and a brush, among other essentials. One customer review praises the strength of the Kiss nails, stating they lasted for about two and a half weeks.
Invest in a Top-Rated Acrylic Kit
For those looking for a more advanced option, consider a top-rated acrylic kit. It features an oil-free prep base, nail tips in 10 different sizes, and promises long-lasting results. One customer review mentions the nails from this kit lasted for over two weeks without any lifting or breaking.
Consider a Streamlined Nail Kit
If simplicity is your style, a streamlined nail kit might be just the ticket. This kit includes three shades of acrylic powder and 100 French nail tips. A customer review states this nail kit is easy to use and recommended for beginners.
Try an Advanced Kit for More Options
For the more adventurous, an advanced kit is available. It comes with a crystal-cut acrylic brush, nourishing cuticle oil, and specialty C-curve extensions. One customer review expresses love for this kit, mentioning the monomer doesn’t smell, the powders are beautiful and easy to work with, and the brush is the best they have used.
Don’t Forget the Cuticle Oil
Cuticle oil is a must for maintaining healthy nails. Etsy for unique and handmade pink and white press-on nails.
DIY Nail Art
Feeling creative? Try your hand at DIY nail art. There are plenty of tutorials online to guide you. You can start with simple designs and gradually work your way up to more complex ones.
Remember, the key to perfect pink and white nails is practice. Don’t be discouraged if your first few attempts don’t turn out as expected. Keep trying, and before you know it, you’ll be creating stunning nail designs like a pro.
In the end, the most important thing is to have fun. Experiment with different designs, play with colors, and let your creativity shine. After all, your nails are a reflection of your personality. So, let them speak for you. Happy painting!
Pink and White Nails Salons and Professionals
Finding the perfect salon for your pink and white nails can be a daunting task. But, with the right guidance, you can make an informed decision.
Start with Research
Begin by researching salons in your area. Look for reviews and ratings online. Websites like Yelp can be a great starting point. However, during our research, we found no relevant content for pink and white nails in Cleveland, OH. So, you might need to dig a little deeper.
Consider the Services
Next, consider the services offered by the salon. For instance, Pink & White Nails Spa offers a wide range of services. They provide professional manicure, pedicure, and waxing services. Plus, they include a paraffin treatment in all manicures.
Check the Environment
A salon’s environment is crucial. It should be healthy and hygienic. Pink & White Nails Spa, located at 7028 Kingsmill Court, Springfield, IL 62712, is known for its clean and comfortable setting.
Look at the Opening Hours
Also, consider the salon’s opening hours. Pink & White Nails Spa is open from 9:30 am to 7:00 pm from Monday to Friday, 9:30 am to 6:00 pm on Saturdays, and 11:00 am to 5:00 pm on Sundays.
Consider the Technician’s Skills
The skill of the nail technician is vital. According to an article on Oh My Nails, allow you to book online. But remember, your booking isn’t confirmed until you receive a call or text from the salon.
Choosing the right salon and technician for your pink and white nails can enhance your experience and results. So, take your time, do your research, and make an informed decision. Happy nail pampering!
DIY Pink and White Nails at Home
If you’re a fan of pink and white nails, but trips to the salon aren’t always feasible, don’t fret! With the right tools, a bit of practice, and a dash of patience, you can achieve salon-quality results right at home.
Choosing Your DIY Kit
Your journey to perfect pink and white nails begins with a quality DIY kit. These kits come equipped with everything you need, from acrylic powder to brushes and files. One such kit is offered by KISS, a trusted name in the nail industry.
Preparation is Key
Before you dive into the application process, proper preparation is crucial. This involves removing any existing polish, pushing back your cuticles, and filing your nails to your desired shape. Remember, a well-prepped nail is the foundation of a flawless manicure.
Follow the Steps
Next, it’s time to follow the step-by-step guide. The process starts with applying a primer to your nails. This helps the acrylic adhere better. Then, you’ll create the white tip using a dry ball of product.

A smaller ball is used to create the smile line. The pink product is applied next, followed by a top coat to seal in your work.
Practice Makes Perfect
Don’t be disheartened if your first few attempts don’t yield perfect results. Like any new skill, mastering pink and white nails takes practice. The more you do it, the better you’ll get. So, keep at it!
Keep Up with Maintenance
Once you’ve achieved your desired look, maintenance is key. A backfill is required about once a month to keep your nails looking fresh and well-kept.
Explore Different Shades
One of the fun aspects of DIY is the freedom to experiment. Try out different shades of pink to create various aesthetics. A soft blush pink can be perfect for spring, while a vibrant hot pink might be just the thing for a bold Valentine’s Day look.
Share Your Creations
Finally, don’t forget to share your creations. Whether it’s through social media or just showing off to your friends, sharing your work can be a great source of motivation and inspiration.
In the end, DIY pink and white nails are a fun and cost-effective way to achieve a professional look from the comfort of your own home. So, roll up your sleeves, grab your kit, and let your creativity shine!